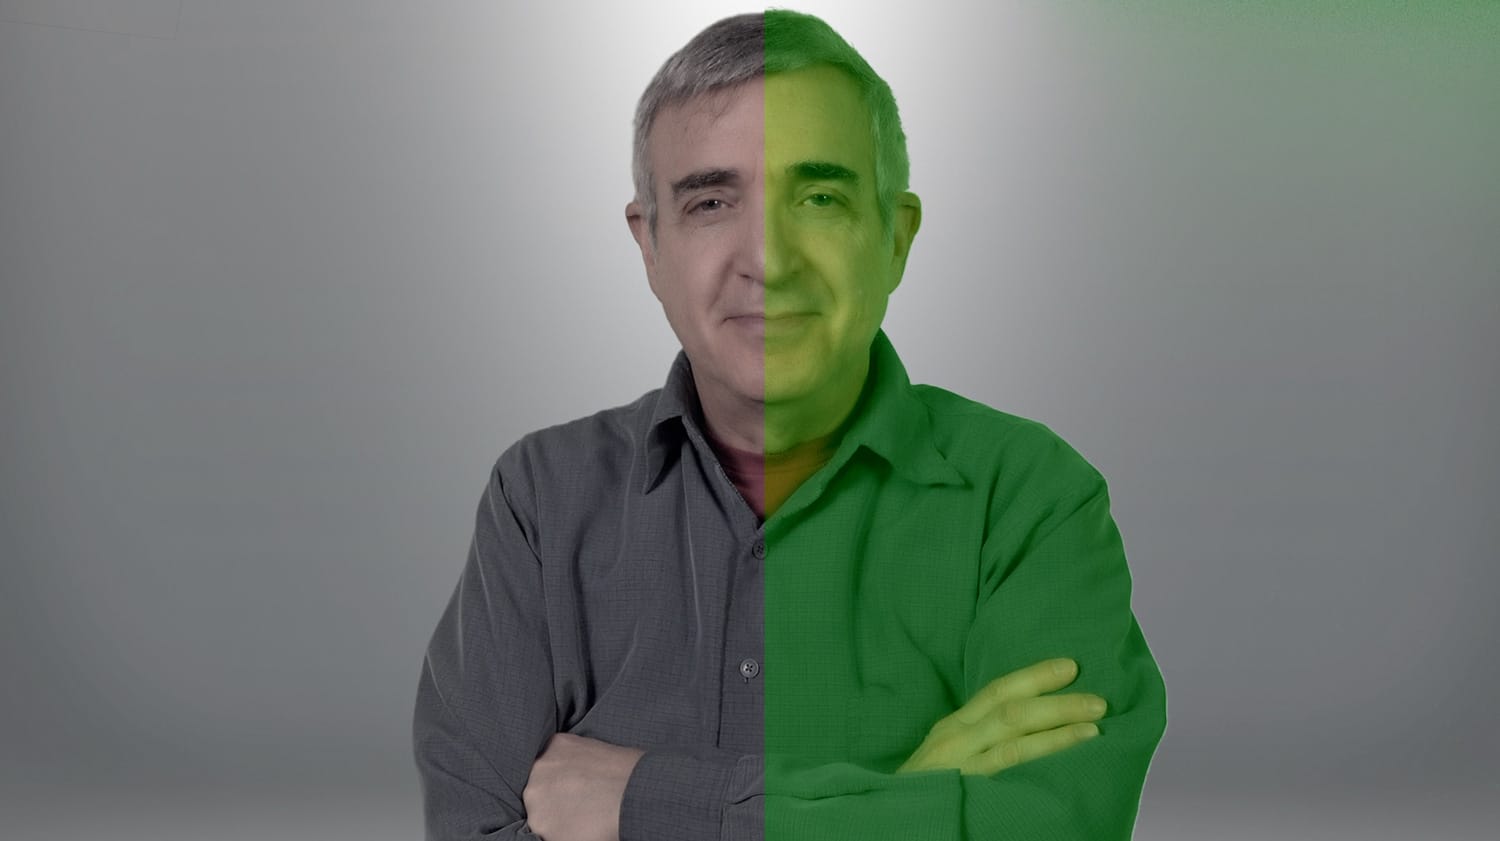
This might seem like a small thing, unless it’s happened to you. When the light hitting the green screen turns your face green, too.
It’s happened to me more times than I can remember.
Why though? And more importantly, how can you eliminate the problem?
It is important to solve because an audience notices even if you don’t. And it makes them uncomfortable; enough to want to leave that video.
Fortunately it’s pretty simple to get your complexion back, even if it got blown off the screen by those tiny green photon torpedoes.
Here are two simple things you can do to keep looking human, actually a pretty coveted attribute these days.
Here’s where to get the free instructions for the layout and design.
5 replies to "How to Rescue Your Complexion From Green Screen Lighting"
Fantastic video Steve, so much useful content clearly explained. As a numbers nerd, what would the settings be you recommend for those of us who still have to work with HD and haven’t made the switch to a 4K camera?
I’m using a Nikon d7200 for my video footage if that helps.
Save us from the ‘well done’ spill suppressor 🙂
Same settings for HD, Jason. 🙂
Fabulous, thanks Steve.
And the updated guide is very helpful too. I noticed you’ve included green screener in the apps. I’ve found that helpful in reducing hotspots by placing my lower infill lights at the right distance from my greenscreen to get the lighting levels as even as possible.
However, I am now downloading your other suggested product in this video to start using as well. Thanks for the tips.
Full redecoration of the studio coming this weekend so a great opportunity to follow all your advice from scratch! I really liked the tip about using black coverings to reduce the green spill. I’ll be looking at that too.
Hi Steve,
I use the GreenScreener app to get reasonably even lighting/uniform color across my green screen. Then, I use the lumetri color scope and a masked area of my forehead in Premiere Pro to adjust color to be on or near the skin tone line (and I also do any fine tuning of white balance with the scope too by masking off a white color card reference held up at the beginning of my recording takes, even though I manually set WB in FILMiC Pro with a reference reflector before shooting). This usually nails the skin tones to be natural and not too red nor too green.
But, always better to address issues in production, rather than trying to compensate in post production editing.
If using an iPhone with FILMiC PRo (i.e. limited to fixed aperture), will the same procedure you outlined in this video work by just adjusting only the ISO and shutter speed? I realize I would have to run the waveform monitor on a different iOS device, since my iPhone will need to be running FILMiC Pro at the same time.
Also, I don’t think there is a setting in FILMiC Pro for Color Space to set to 4:2:2, just resolution, bit rate, aspect-ration, FPS, ISO, and shutter speed. I assume the color space setting just reduces stray green light, but really not sure what that is all about. So, same question, is your procedure in this video still a way to do things by the number, even with fixed aperture and no color space setting?
Thanks!
Jeff
As you know better than most, Jeff, the main problem with the iPhone is ISO and the way it makes your skin look plastic. You have understood that better than anyone I’ve seen using an iPhone to do green screen work.
You don’t get 4:2:2 color space with an iPhone, but you do get 4K and a high bit rate in FilmicPro if you want it, so that’s something.
I think you could simplify your procedure by using the waveform monitor app rather than greenscreenr, which drives me absolutely batty.
But doing green screen with an iPhone in the first place is not something I would recommend to anyone but you, seeing as you’ve carefully, thoughtfully and persistently gone through all the stages.
Someday you’ll have to make a video about what we went through to get you there. 🙂